Picture this: you\’re getting ready for a night out and you\’ve spent hours perfecting your hair and makeup, but there\’s one final touch that\’s missing. Your fabulous wig. But before you can rock that stunning hairpiece, you need to go through the seemingly daunting task of applying wig glue. Don\’t worry, we\’ve got your back. In this article, we will share with you 10 ingenious wig glue hacks that will make the application process an absolute breeze. Say goodbye to sticky situations and messy mishaps, and get ready to slay effortlessly with your flawless wig.
1. Choosing the Right Wig Glue
Consider Your Hair Type
When it comes to choosing the right wig glue, it\’s essential to consider your hair type. Different hair types may require different types of glue to ensure a secure and long-lasting hold. For example, if you have oily or sweaty scalp, you may want to opt for a stronger hold glue that can withstand moisture. On the other hand, if you have a sensitive scalp, you may need to look for a gentle adhesive that won\’t cause irritation. Understanding your hair type will help you narrow down the options and find the perfect wig glue for you.
Check the Hold Strength
Hold strength is another crucial factor to consider when selecting wig glue. The hold strength determines how well the adhesive will keep your wig in place. Some wig glues offer a light hold, which is suitable for daily wear or short-term events. However, if you\’re planning to wear your wig for an extended period or during activities that require a more secure hold, such as dancing or sports, you may want to choose a stronger hold glue. Make sure to read the product descriptions carefully to ensure you select a glue with the appropriate hold strength for your needs.
Read Reviews and Recommendations
Before making a final decision, take the time to read reviews and seek recommendations from other wig wearers. Reading personal experiences and testimonials can provide valuable insights into the performance and reliability of different wig glues. Look for reviews that mention factors such as longevity, ease of application, and comfort. Additionally, reach out to friends, online communities, or beauty professionals who have extensive wig-wearing experience. Their recommendations can be invaluable in helping you choose a wig glue that delivers the results you desire.
2. Prepping Your Scalp
Cleanse Your Scalp
Before applying the wig glue, it\’s essential to ensure that your scalp is clean and free from any oils, dirt, or residue. This clean scalp serves as a smooth canvas for the adhesive, allowing for better adhesion and longevity. Start by thoroughly shampooing your hair and scalp with a mild cleanser. Rinse thoroughly to remove any product buildup or excess oil. This cleansing step helps create an optimal environment for the wig glue to adhere to your scalp.
Exfoliate Your Scalp
Exfoliating your scalp is a crucial step in prepping for wig application. Use a gentle exfoliating scrub or a soft brush to remove dead skin cells and promote healthy blood flow to the scalp. This process not only helps create a smooth surface for the wig glue but also enhances circulation, which can contribute to healthier hair growth. Take your time during this step and massage your scalp gently to revitalize it.
Apply Scalp Protector
To protect your scalp from potential irritation caused by the wig glue, it\’s recommended to apply a scalp protector. A scalp protector creates a barrier between the adhesive and your skin, reducing the risk of discomfort or allergic reactions. Apply a thin layer of scalp protector onto your clean and exfoliated scalp, paying extra attention to the areas where the wig will be secured. Allow the scalp protector to fully dry before moving on to the next step.

3. Applying the Wig Glue
Use a Cosmetic Sponge
When it\’s time to apply the wig glue, using a cosmetic sponge can help ensure a smooth and even application. Dip the cosmetic sponge into the glue and gently dab it onto your scalp where the wig will be attached. The sponge allows for more precise application, helping you avoid excess glue or uneven distribution. By using a cosmetic sponge, you can achieve a professional-looking finish and prevent any lumps or bumps from forming.
Apply Thin Layers
To achieve a secure hold without weighing down your scalp, it\’s important to apply the wig glue in thin layers. Start by applying a thin, even layer of glue to your scalp using the cosmetic sponge. As you apply the glue, make sure to spread it outwards from the center to the perimeter of the area where the wig will be attached. This technique helps distribute the glue evenly and ensures proper adhesion across the entire surface.
Let Each Layer Dry
After applying each thin layer of wig glue, give it time to dry before applying the next layer. The drying process allows the glue to become tacky, providing better adhesion and reducing the risk of slippage. Be patient and give each layer enough time to dry completely. This may take a few minutes, depending on the specific glue you\’re using. Avoid rushing the drying process as it can compromise the effectiveness and longevity of the adhesive.
Use a Blow Dryer for Faster Drying
If you\’re looking to speed up the drying process, you can use a blow dryer on a low setting. Keep the blow dryer at a safe distance from your scalp and wig to prevent damage from excessive heat. Gently blow dry the glued area, taking care not to disturb the layers of glue. This method can help expedite the drying time and ensure that the wig adhesive sets properly.
4. Securing the Wig
Apply Glue to the Perimeter
To securely attach your wig, focus on applying the glue to the perimeter of your scalp. This includes the hairline, temples, and nape of the neck. These areas are crucial for anchoring the wig in place and creating a seamless blend. Use the cosmetic sponge to apply a thin layer of glue along the perimeter, ensuring an even distribution. Be mindful not to apply the glue directly on the hair as it can cause damage or make the wig difficult to remove.
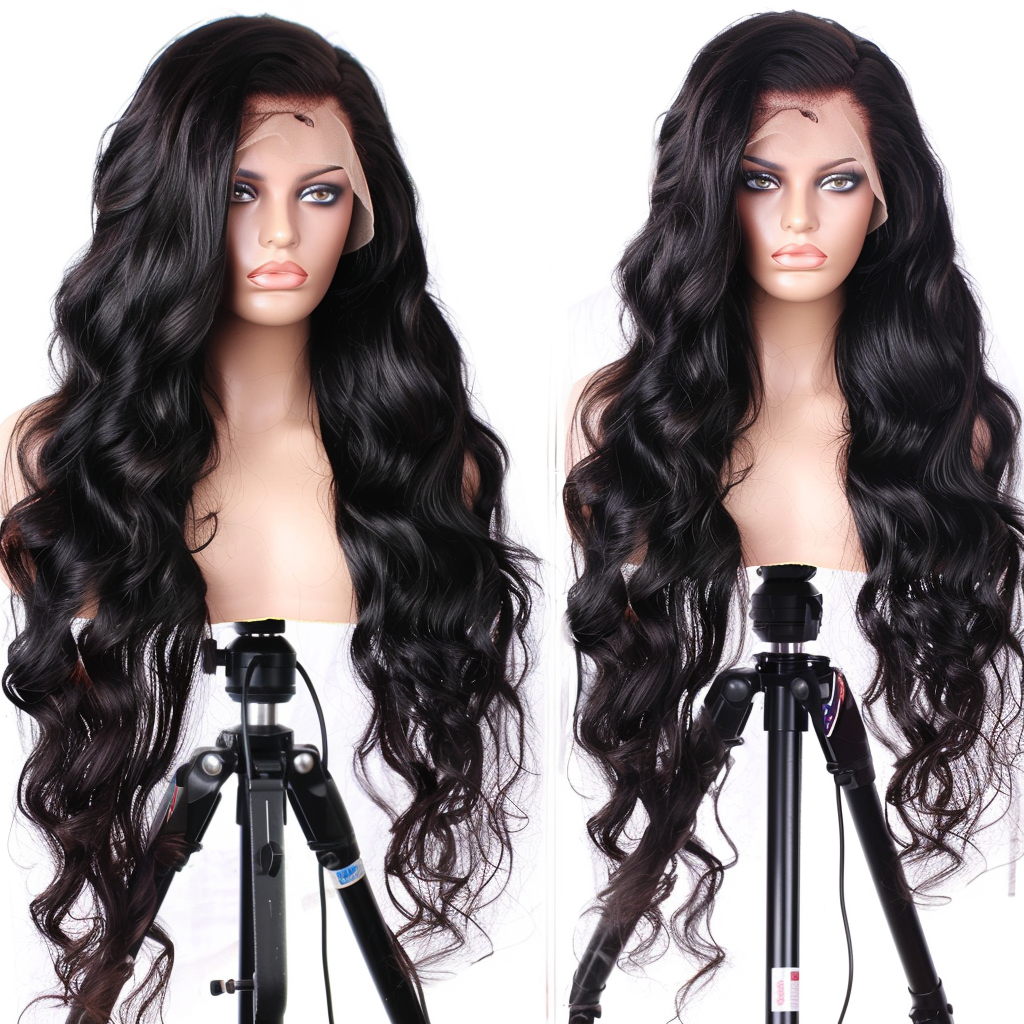
Focus on the Hairline
When securing your wig, paying particular attention to the hairline is essential for achieving a natural and undetectable look. Apply a thin layer of glue along the hairline, ensuring that it blends seamlessly with your natural hairline. Take your time and use a steady hand to achieve precision. This attention to detail will enhance the realism of your wig and give you the confidence to wear it with pride.
Use Lace Tint for a Natural Look
If your wig has lace or a lace front, consider using a lace tint to match the color of the lace to your skin tone. This step can make the wig appear more natural by creating a seamless transition between the wig\’s lace and your scalp. Carefully apply the lace tint using a small brush or sponge, ensuring even coverage. Allow the tint to dry completely before proceeding with the application process. This simple trick can make a significant difference in the overall appearance of your wig.

5. Dealing with Excess Glue
Remove Excess Glue with Alcohol
Sometimes, during the wig application process, excess glue may seep out and create a mess. To clean up any stray glue, dip a cotton swab or soft cloth into alcohol and carefully dab it onto the affected areas. The alcohol will help dissolve the glue, making it easier to remove. Take your time and be gentle to prevent any damage to your wig or scalp. Repeat this process until all excess glue is removed, leaving you with a clean and polished look.
Use an Adhesive Remover
In some cases, excess glue may be difficult to remove with alcohol alone. That\’s where adhesive removers come in handy. These specially formulated products are designed to safely and effectively remove wig glue residue without causing harm to your wig or scalp. Follow the instructions provided with the adhesive remover and apply it to the affected areas. Allow the remover to work its magic, and then gently wipe away the residue with a soft cloth or cotton pad.
6. Extending the Wear Time
Apply an Additional Layer of Glue
If you\’re looking to extend the wear time of your wig, you can apply an additional layer of glue. After securing your wig initially, you can carefully lift small sections and apply a thin layer of glue directly onto the scalp. This technique provides extra reinforcement and prolongs the adhesive\’s effectiveness. Avoid applying too much glue in one area, as it can create unnecessary bulk or make the wig uncomfortable to wear. Take your time and work in small sections for optimal results.
Use a Wig Grip or Band
To further enhance the security of your wig and reduce the need for frequent touch-ups, consider using a wig grip or band. A wig grip is a band made of a velvety material that wraps around your head, providing extra grip and stability for the wig. It helps prevent slippage and ensures that your wig stays in place throughout the day. Similarly, a wig band can be worn underneath the wig to secure it tightly against your scalp. These accessories are especially useful for those with active lifestyles or for occasions where extra stability is required.
Avoid Sleeping with the Wig
While it may be tempting to keep your wig on while sleeping, it\’s generally recommended to remove it before bed. Giving your scalp and natural hair a break allows them to breathe and recover. Additionally, sleeping with a wig can lead to tangling, frizz, and unnecessary wear and tear. Get into the habit of gently removing your wig before sleep and storing it properly to maintain its quality and longevity.

7. Removing the Wig
Use an Adhesive Remover
When it\’s time to remove your wig, an adhesive remover will be your best friend. Apply the remover to the areas where the wig is attached, allowing it to penetrate and loosen the adhesive. This gentle and careful process will ensure that the wig comes off smoothly without causing any discomfort or damage to your natural hair or scalp. Follow the instructions provided with the adhesive remover and take your time to remove the wig gently.
Gently Lift the Lace
Once the adhesive remover has had time to work, gently lift the lace of the wig, starting from one side and gradually making your way across. Use your fingers or a comb to gently separate the lace from your scalp, avoiding any tugging or pulling. Take your time and be patient during this process to avoid damaging the lace or your natural hair. With a gentle touch, the wig should come off easily, leaving your scalp free and ready for the next steps.
8. Properly Cleaning the Wig
Remove Excess Glue
After removing the wig, it\’s important to remove any excess glue to keep your wig in pristine condition. Gently comb through the wig, paying close attention to the areas where the glue was applied. Use your fingers or a comb to carefully scrape off any residual glue, working in small sections. Take your time and be gentle to prevent any unnecessary damage to the wig fibers.
Wash the Wig with Shampoo
To thoroughly clean your wig, wash it with a wig-specific shampoo. Fill a basin or sink with lukewarm water and add a small amount of wig shampoo. Gently immerse the wig in the water and agitate it, ensuring that the shampoo reaches all areas of the wig. Be gentle and avoid rubbing or twisting the wig, as this can cause tangling or shedding. Rinse the wig thoroughly with lukewarm water until all shampoo residue is removed.
Condition and Air Dry the Wig
After washing, it\’s important to condition the wig to maintain its softness and shine. Apply a small amount of wig conditioner to your hands and work it through the strands of the wig, avoiding the cap or lace. Allow the conditioner to sit for a few minutes to deeply nourish the fibers. Rinse the wig under lukewarm water until the water runs clear, ensuring that all conditioner is thoroughly removed. Gently squeeze out excess water and pat the wig dry with a towel. Then, place the wig on a wig stand or mannequin head to air dry completely before storing.
9. Storing the Wig

Remove Any Residue
Before storing your wig, make sure there is no residue or styling products left on it. Gently comb through the wig with a wide-toothed comb to remove any tangles or knots. Check the cap for any glue remnants or dirt and wipe it clean with a damp cloth or mild cleansing solution. Taking the time to remove any residue ensures that your wig remains fresh and ready to wear for its next use.
Place the Wig on a Stand or Mannequin
To maintain the shape and style of your wig, it\’s best to store it on a wig stand or mannequin head. Choose a stand or head that closely matches the size and shape of your own head to provide the most natural storage for your wig. Carefully place the wig onto the stand or head, adjusting it to ensure that it sits securely in place. This method of storage prevents the wig from tangling or losing its shape while not in use.
Cover with a Wig Cap or Net
To protect your wig from dust, dirt, and other environmental factors, cover it with a wig cap or net before storing. These protective covers act as a barrier, preventing your wig from coming into contact with potentially damaging elements. Simply stretch the cap or net over the wig, ensuring that all the hair is neatly tucked in. This additional layer of protection helps to maintain the cleanliness and overall quality of your wig between uses.
10. Troubleshooting Common Issues
Dealing with Lifted Edges
If you experience lifted edges or corners of your wig, don\’t worry, there are solutions. One option is to gently lift the area and apply a small amount of adhesive underneath, ensuring that you don\’t overapply and cause unnecessary bulk. Press the lifted edges down firmly, holding them in place for a few seconds to allow the adhesive to set. Alternatively, you can use wig tape to secure the lifted edges. Cut the tape into small strips and apply them to the affected areas, gently pressing the wig down. This quick fix will help keep your wig secure and prevent any visible lifting.
Fixing Over-Application of Glue
If you accidentally overapply wig glue and it becomes visible, you can resolve this issue by using a small brush or cosmetic sponge to gently remove the excess. Dip the brush or sponge into adhesive remover or alcohol and carefully wipe away the excess glue. Be cautious and gentle during this process to avoid damaging the lace or the wig fibers. Once the excess glue is removed, proceed with the drying and securing steps outlined above to ensure a secure and natural-looking attachment.
Repairing Torn Lace
If you encounter a tear or damage in the lace of your wig, it\’s essential to address it promptly to prevent further tearing or deterioration. Start by carefully cleaning the affected area with a mild cleanser and patting it dry. Using a wig repair adhesive specifically designed for lace repair, apply a thin layer of adhesive to both sides of the tear. Allow the adhesive to become tacky, and then press the lace together, holding it firmly in place for a few seconds. Be cautious and work in small sections to maintain control and achieve an even repair. Once the adhesive has fully dried, style and wear your wig confidently, knowing that the lace tear has been resolved.
With these wig glue hacks and tips, you can achieve an effortless and secure application process. By choosing the right wig glue, prepping your scalp correctly, applying the adhesive properly, and taking care of your wig through cleaning, storage, and troubleshooting, you\’ll be able to confidently wear and enjoy your wig in style. Remember to have fun and experiment with different wig styles, knowing that you have the knowledge and tools to create a flawless and natural look every time you wear your wig.